Devlog Part 2 - Github Pages Deployment
Yesterday we installed Ruby and created a Github repository to host our devlog. Today we will be creating a Jekyll site to make managing it easier. This raises two questions:
-
What is a devlog?
-
What is Jekyll?
Devlog
We saw this definition at the beginning of class on Monday:
devlog (noun): A log in which a developer records the topics, concepts, milestones, successes and failures during the development process of a project.
As we start working on the Congressional App Challenge, you will need a place to keep track of its development. Creating a devlog for this purpose serves two goals:
-
You will become a better developer as you reason through the development of your project in a structured way, creating a repository of notes and references for future use as you progress through it.
-
You will find that writing through the steps you took to build your app will also help with finding connections between the concepts you use, improving your understanding of the large and quickly-evolving landscape of web development technologies.
Your devlog will be a static website hosted on Github Pages.
Static Site Generators
In previous lessons, we have created HTML files, added them to a repository and we can immediately see our site live once we have confirmed (“pushed”) our changes to Github. Why are we using a tool like Jekyll this time around, and what is it in the first place?
Jekyll is a static site generator built with Ruby (this is why we had to install the language in our last lesson). But what’s a static site generator?
Websites nowadays are complex: some of them simply show information. Take for example a restaurant website that displays the menu, locations, and working hours. Since this type of website does not update its content often, its pages are considered static, and once it has been deployed to a live website, e.g. http://myrestaurant.com, there’s not much need to update it.
Now imagine a more complex version of this website, where customers can make reservations, place orders, pay online, and track their estimated delivery time. Writing the HTML files for all of these processes is not only unfeasible, but downright impossible, since there is no way to know much of the information ahead of time, such as the name of a customer or what kind of food they’ll order.
Your devlog falls somewhere in the middle. You will be updating it as you build your Congressional App Challenge app, so that means you need a way to change its contents easily and often. But a fullstack web development framework such as Rails would be far too much for that, so Jekyll provides all the tooling to meet that happy medium.
Jekyll
The purpose of a static site generator like Jekyll is to take files written in an easy-to-read (and write!) format like Markdown and convert them to HTML, this way you can focus on adding text, links, images, files and other content related to the development of your application, leaving the processing and deployment of the website to Jekyll.
To oversimplify: a Jekyll site is a regular website with some specific folder names. After you finish setting up your site and it is live on Github Pages, your only focus will be to manage Markdown files, never having to worry about the HTML, CSS, and all other assets. The reason we are using Jekyll is because we are also using Github to save our code, and Jekyll was made by Tom Preston-Werner, the co-founder of Github1 so Jekyll and Github Pages work together by default.
In reality, a Jekyll site is just a folder with some important files:
- A configuration file for your website settings named
_config.yml - A folder for your content called
_posts - Optional folders where you can create templates for other pages, like your very own 404 “Page not Found”, a custom “About”, “Contact”, or whatever you want.
To make things easy, we will be creating a devlog with the default theme provided by Jekyll, this way your project folder will only have the most basic and necessary files to make it work and everything else will be stored away in a Ruby gem. Ruby gems are code libraries which you can include in a project, very much like any import statement at the top of a Python script. Code libraries enhance the abilities of your app, like when you use Math.sqrt(n) to find the square root of a number, where Math is the library and .sqrt() is the method, i.e., a function belonging to a class that accepts some input and outputs an answer.
Install Jekyll on Windows
Open a new command prompt window from the start menu. Install Jekyll and Bundler using:
$ gem install jekyll bundler
Check if Jekyll has been installed properly: jekyll -v.
After these two gems have been successfully installed, we are ready to turn our current project into a Jekyll site.
Creating the Jekyll site
Right now, your project only has one file and its file structure looks like this:
.
└── README.md
We need to add a few more files to make this into a devlog. We will use a tool called Bundler to manage the gems we install in our computer. Bundler makes sure we have the right version of each one. Since gems depend on each other, Bundler checks the version number of each one and keeps them all working together.
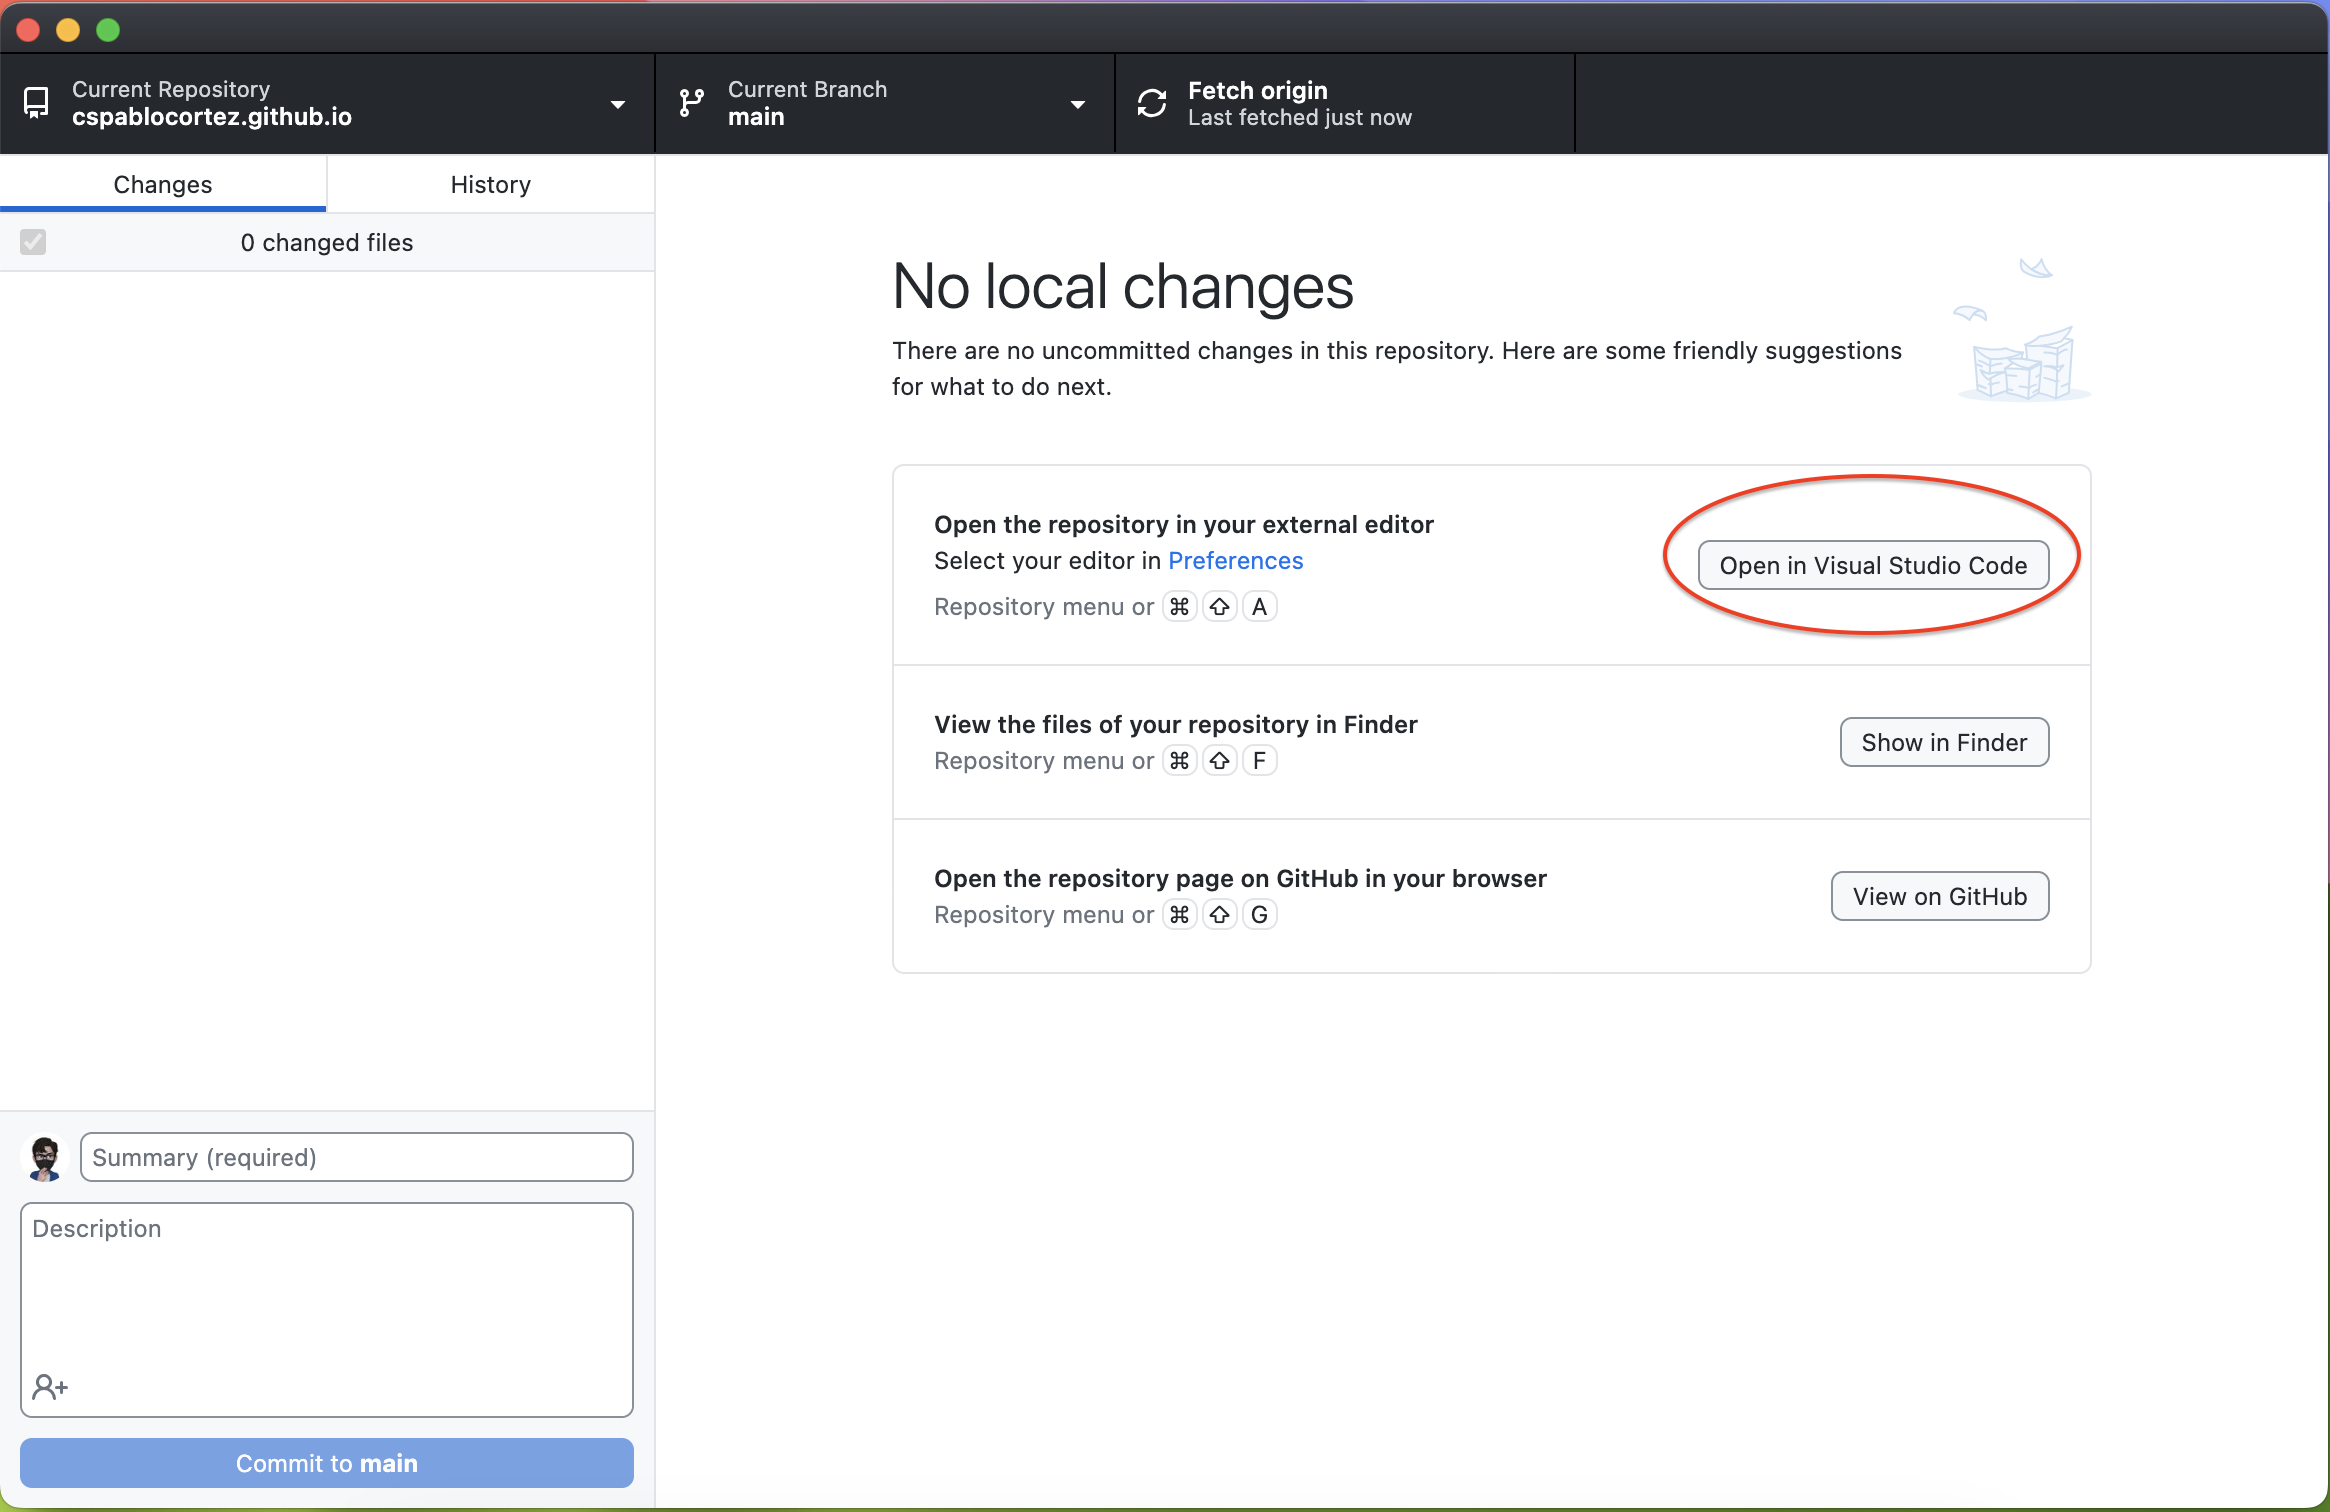
First we have to open Github Desktop and find our project. Next, open it up in Visual Studio Code.
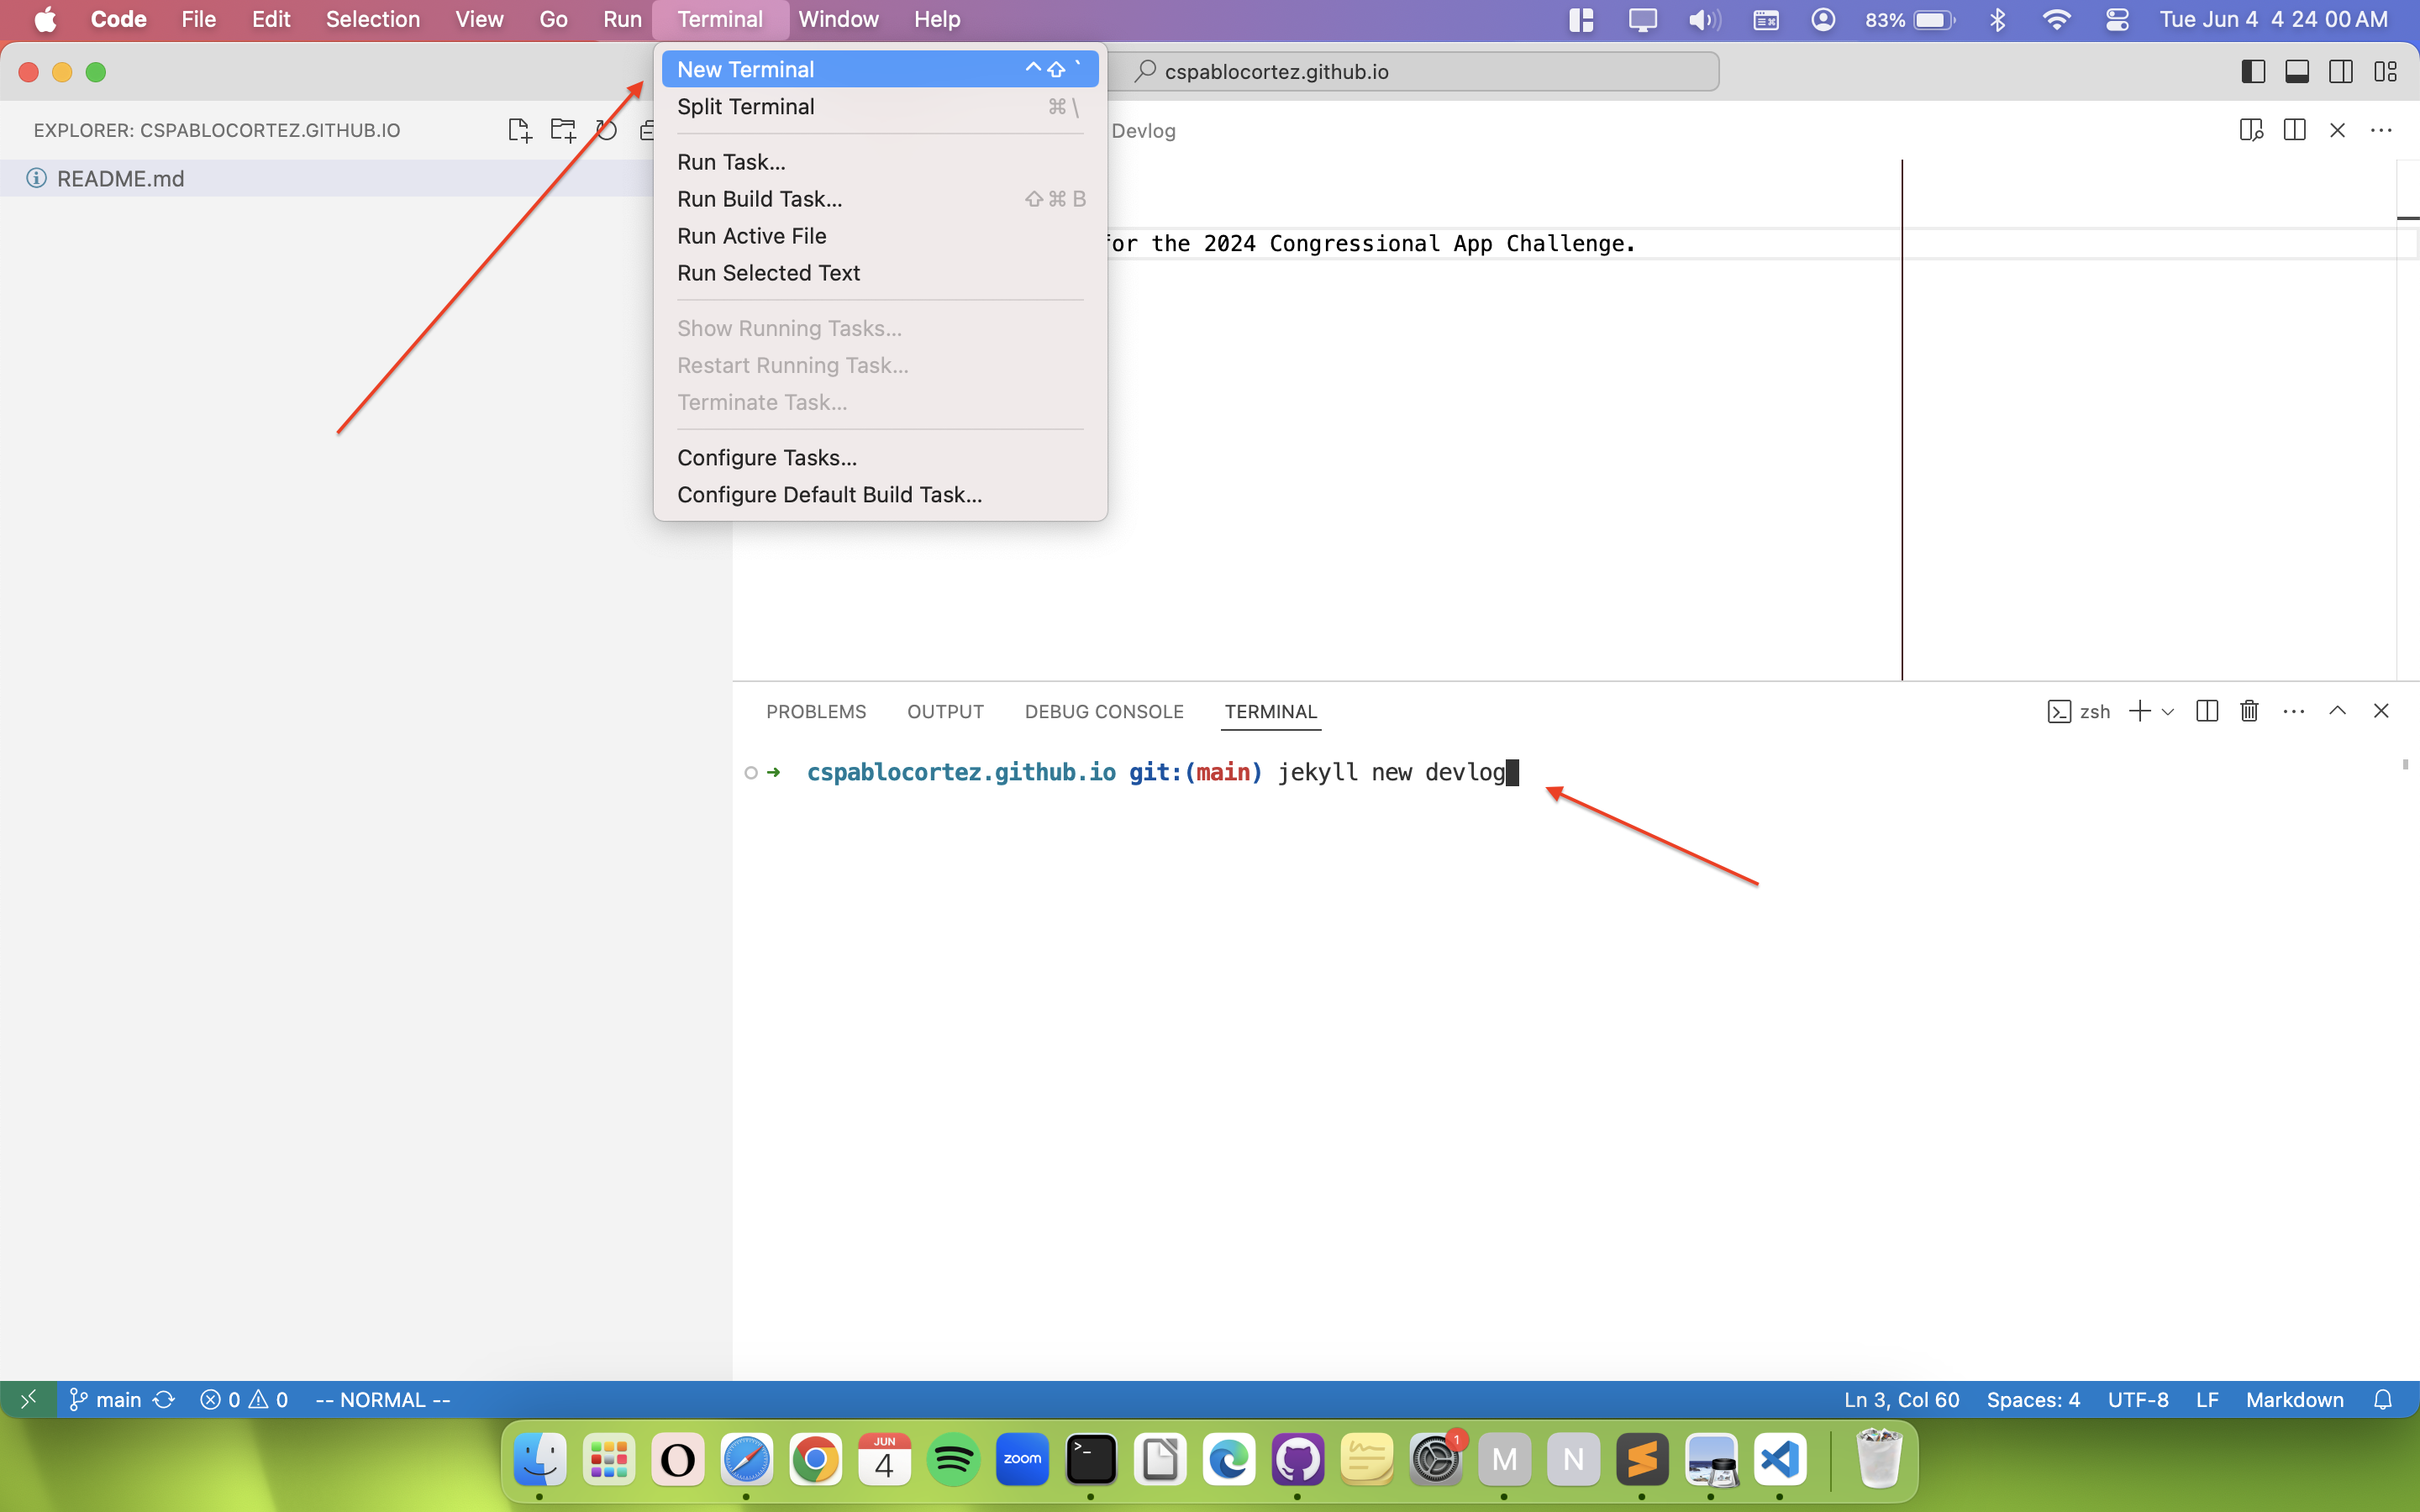
Open a new Terminal and write the following command (make sure the Terminal is pointed to the current project directory).
$ jekyll new devlog
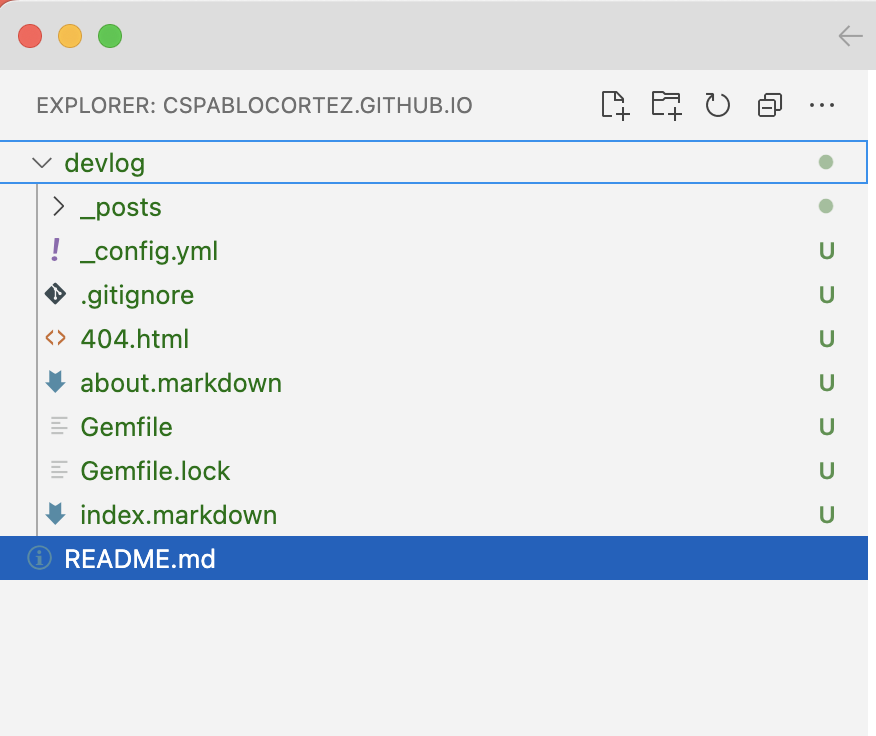
This should create a folder called devlog with the following files inside:
Organizing the file structure
Since we want the entire project to be stored in the root folder rather than inside the devlog folder, we have to move its files up one level. Type the following command into your Terminal:
$ mv devlog/* ./
Note: On the Windows command prompt, you must use move instead of mv, like so:
$ move devlog/* ./
This command tells the computer to take all files (the asterisk is a wildcard, a symbol to capture all files) and move them out of the devlog/ folder into the current working directory, i.e., <username>.github.io/)
There is one more file we have to move out of devlog/. The .gitignore file starts with a period, which means it is invisible. In this file, Jekyll tells Github to not upload the finished site, since this process is done automatically for you and we don’t want to add unnecessary content to our repository. Make sure to move it out of the folder by running the following command:
Unix:
$ mv devlog/.gitignore ./
Windows:
$ move devlog/.gitignore ./
With all files out of the devlog/ folder, verify that it is empty and go ahead and delete it.
Building the site
To see the results of your Jekyll site, you have to start a local server:
$ bundle exec jekyll serve
Note: You may need to run $ bundle install in case of
any missing dependencies.
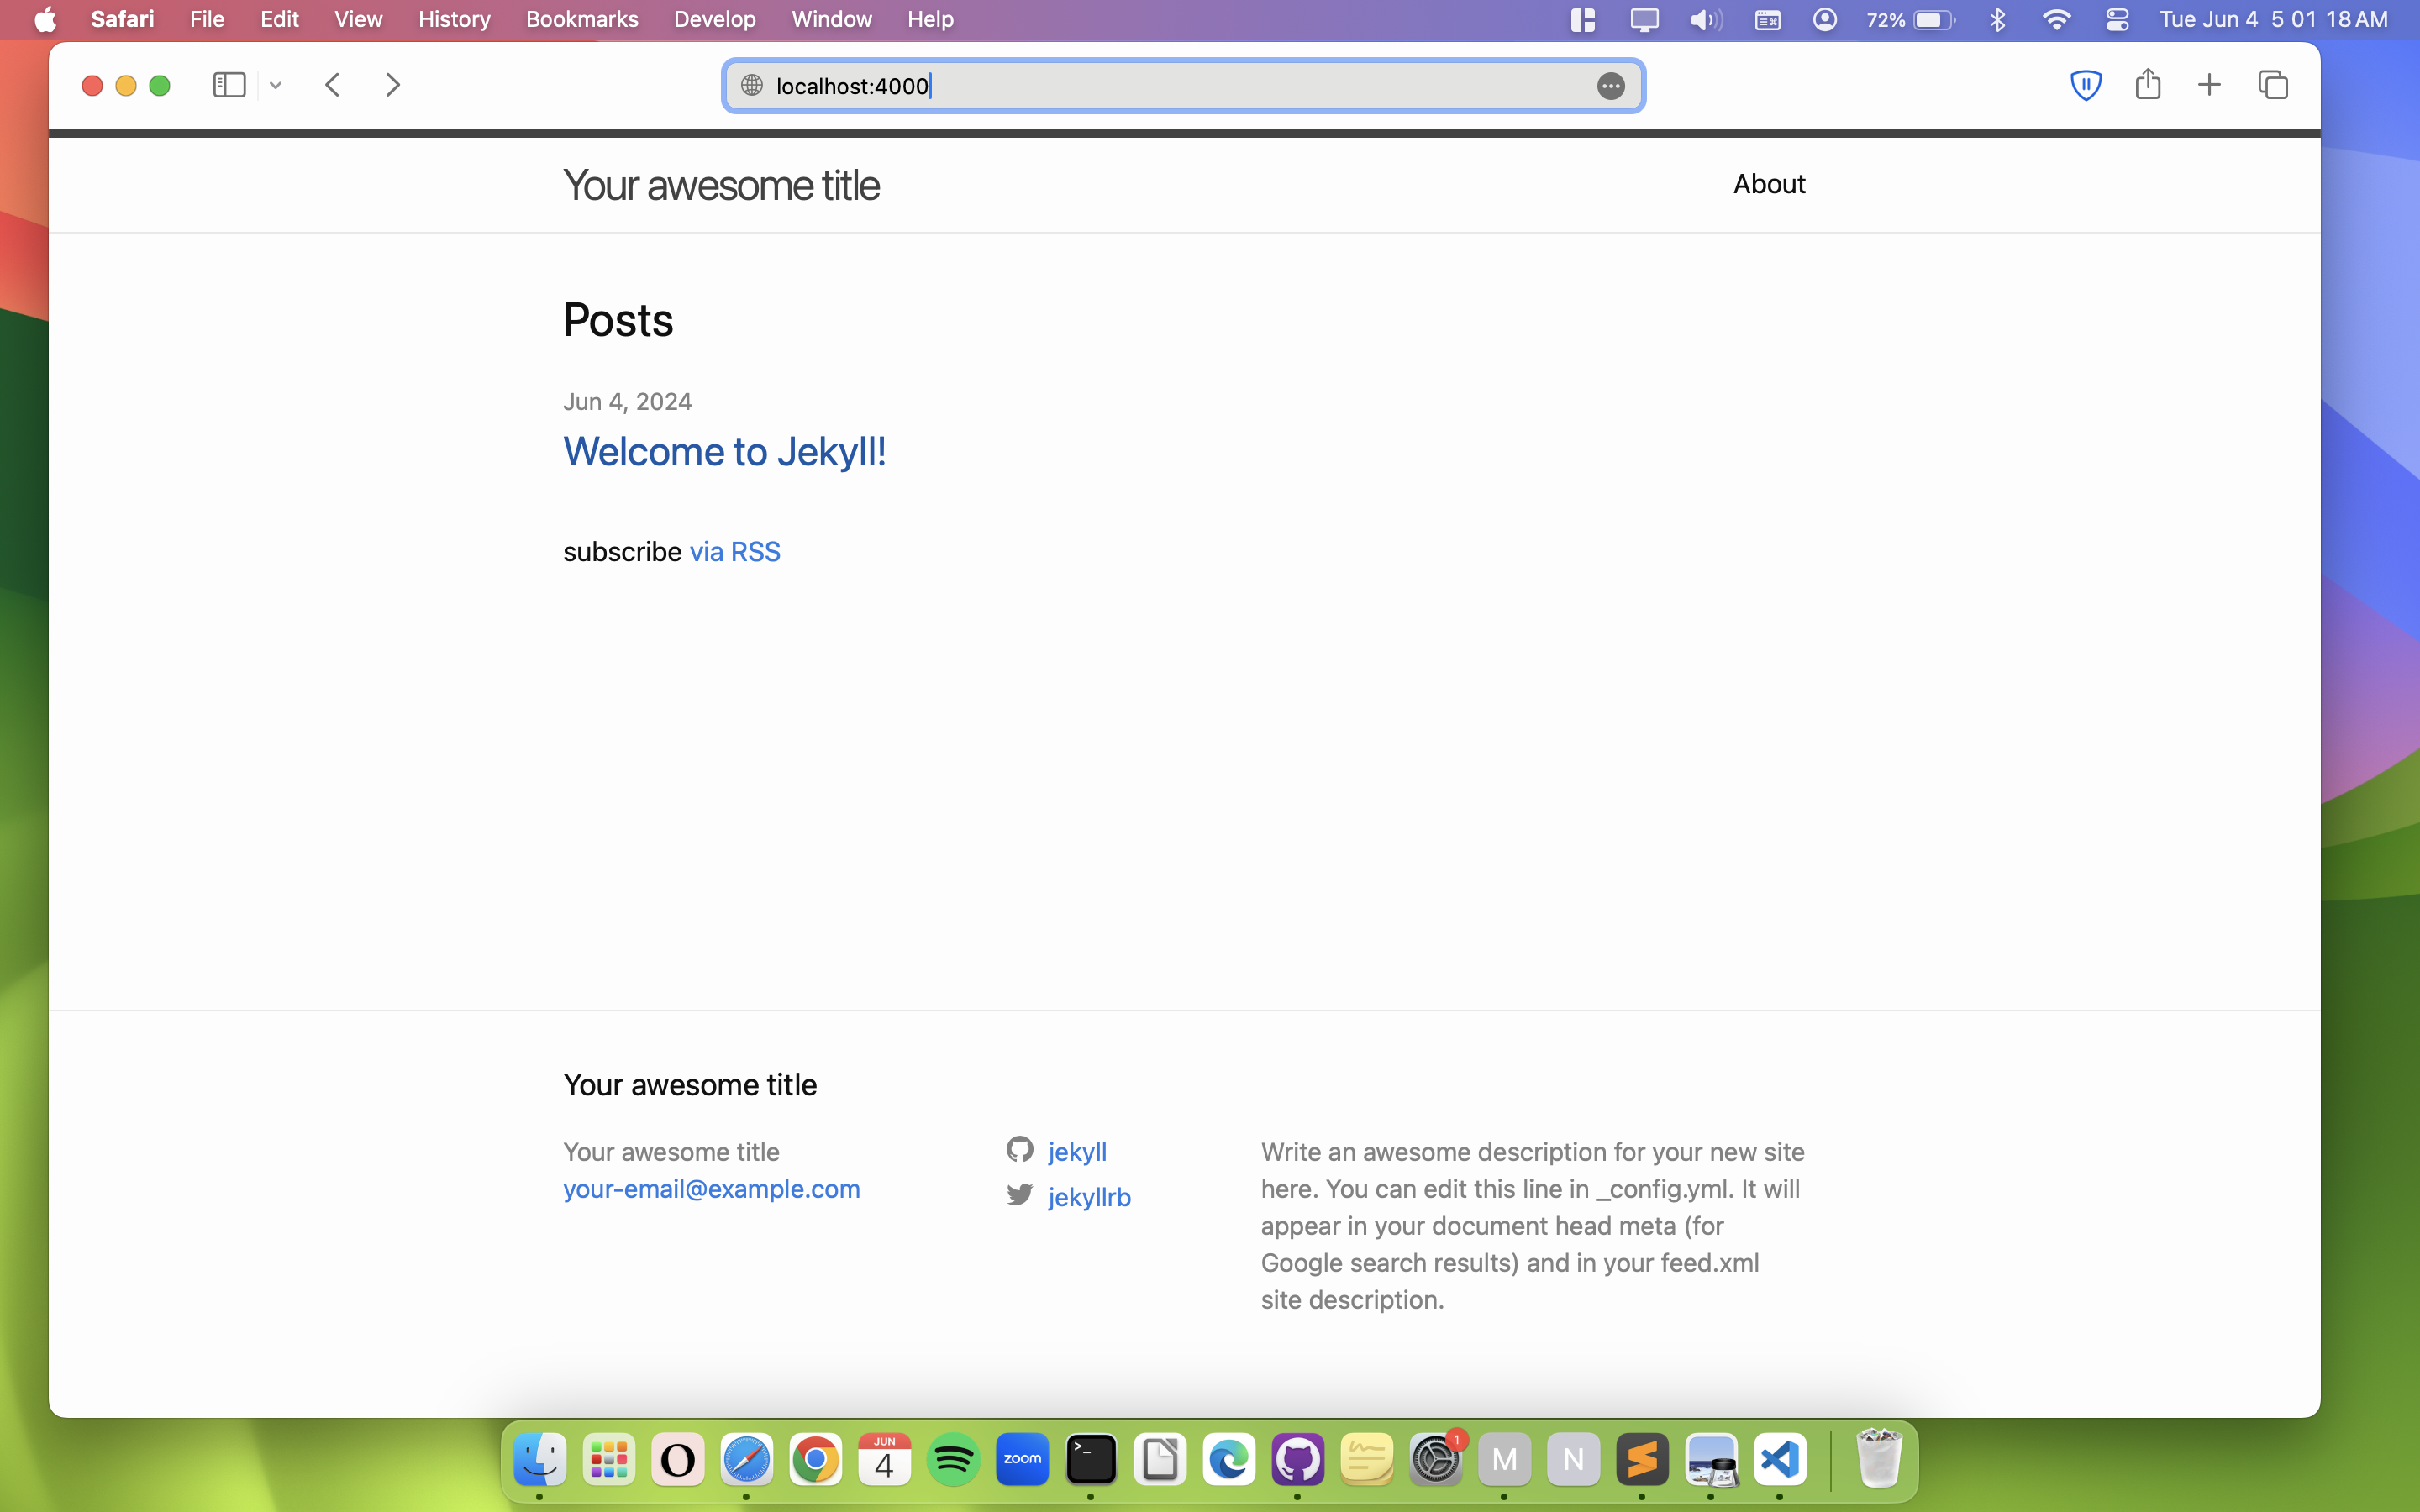
The bundle exec part of the command ensures that Jekyll uses the version defined in your Gemfile to launch your site. This is important when you use a theme, since Jekyll themes, which alter your site’s appearance, are installed as gems. With the serve command, you should be able to see your site by visiting http://localhost:4000 with your web browser.
Github Pages Deployment
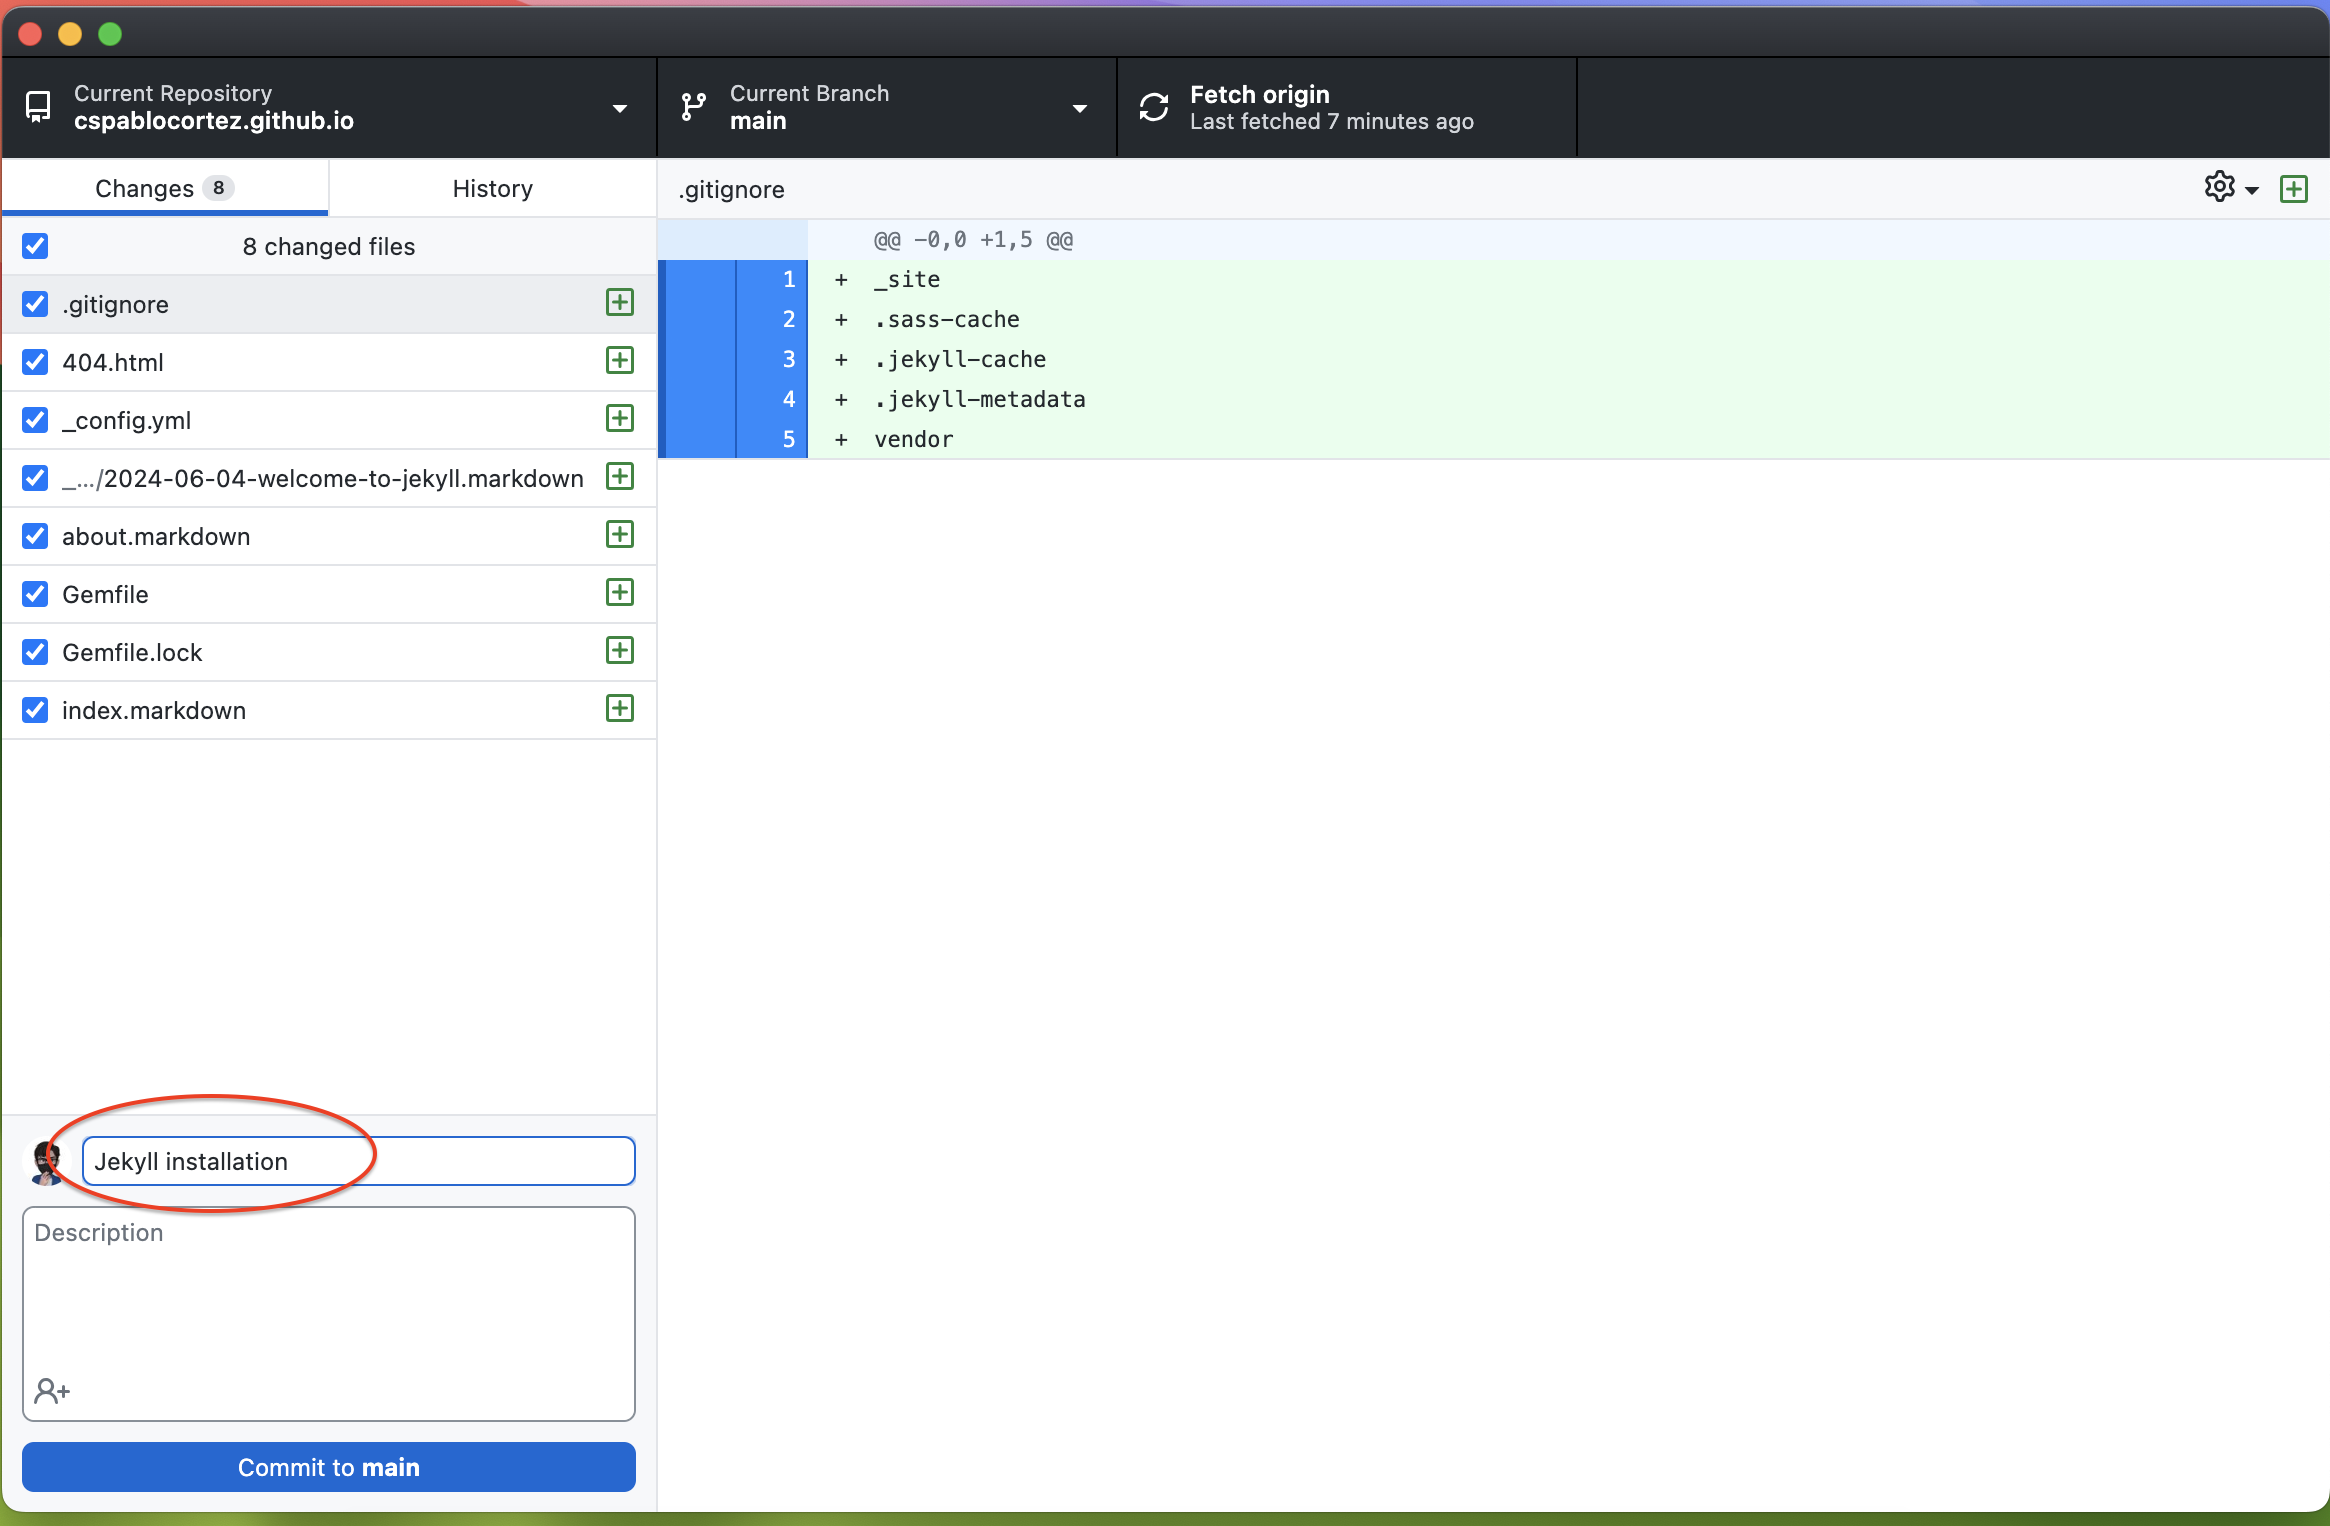
At this point, we are ready to commit and push these changes to the Github Repository. Go back to Github Desktop, write a brief commit message for these changes and push them.
Live Site
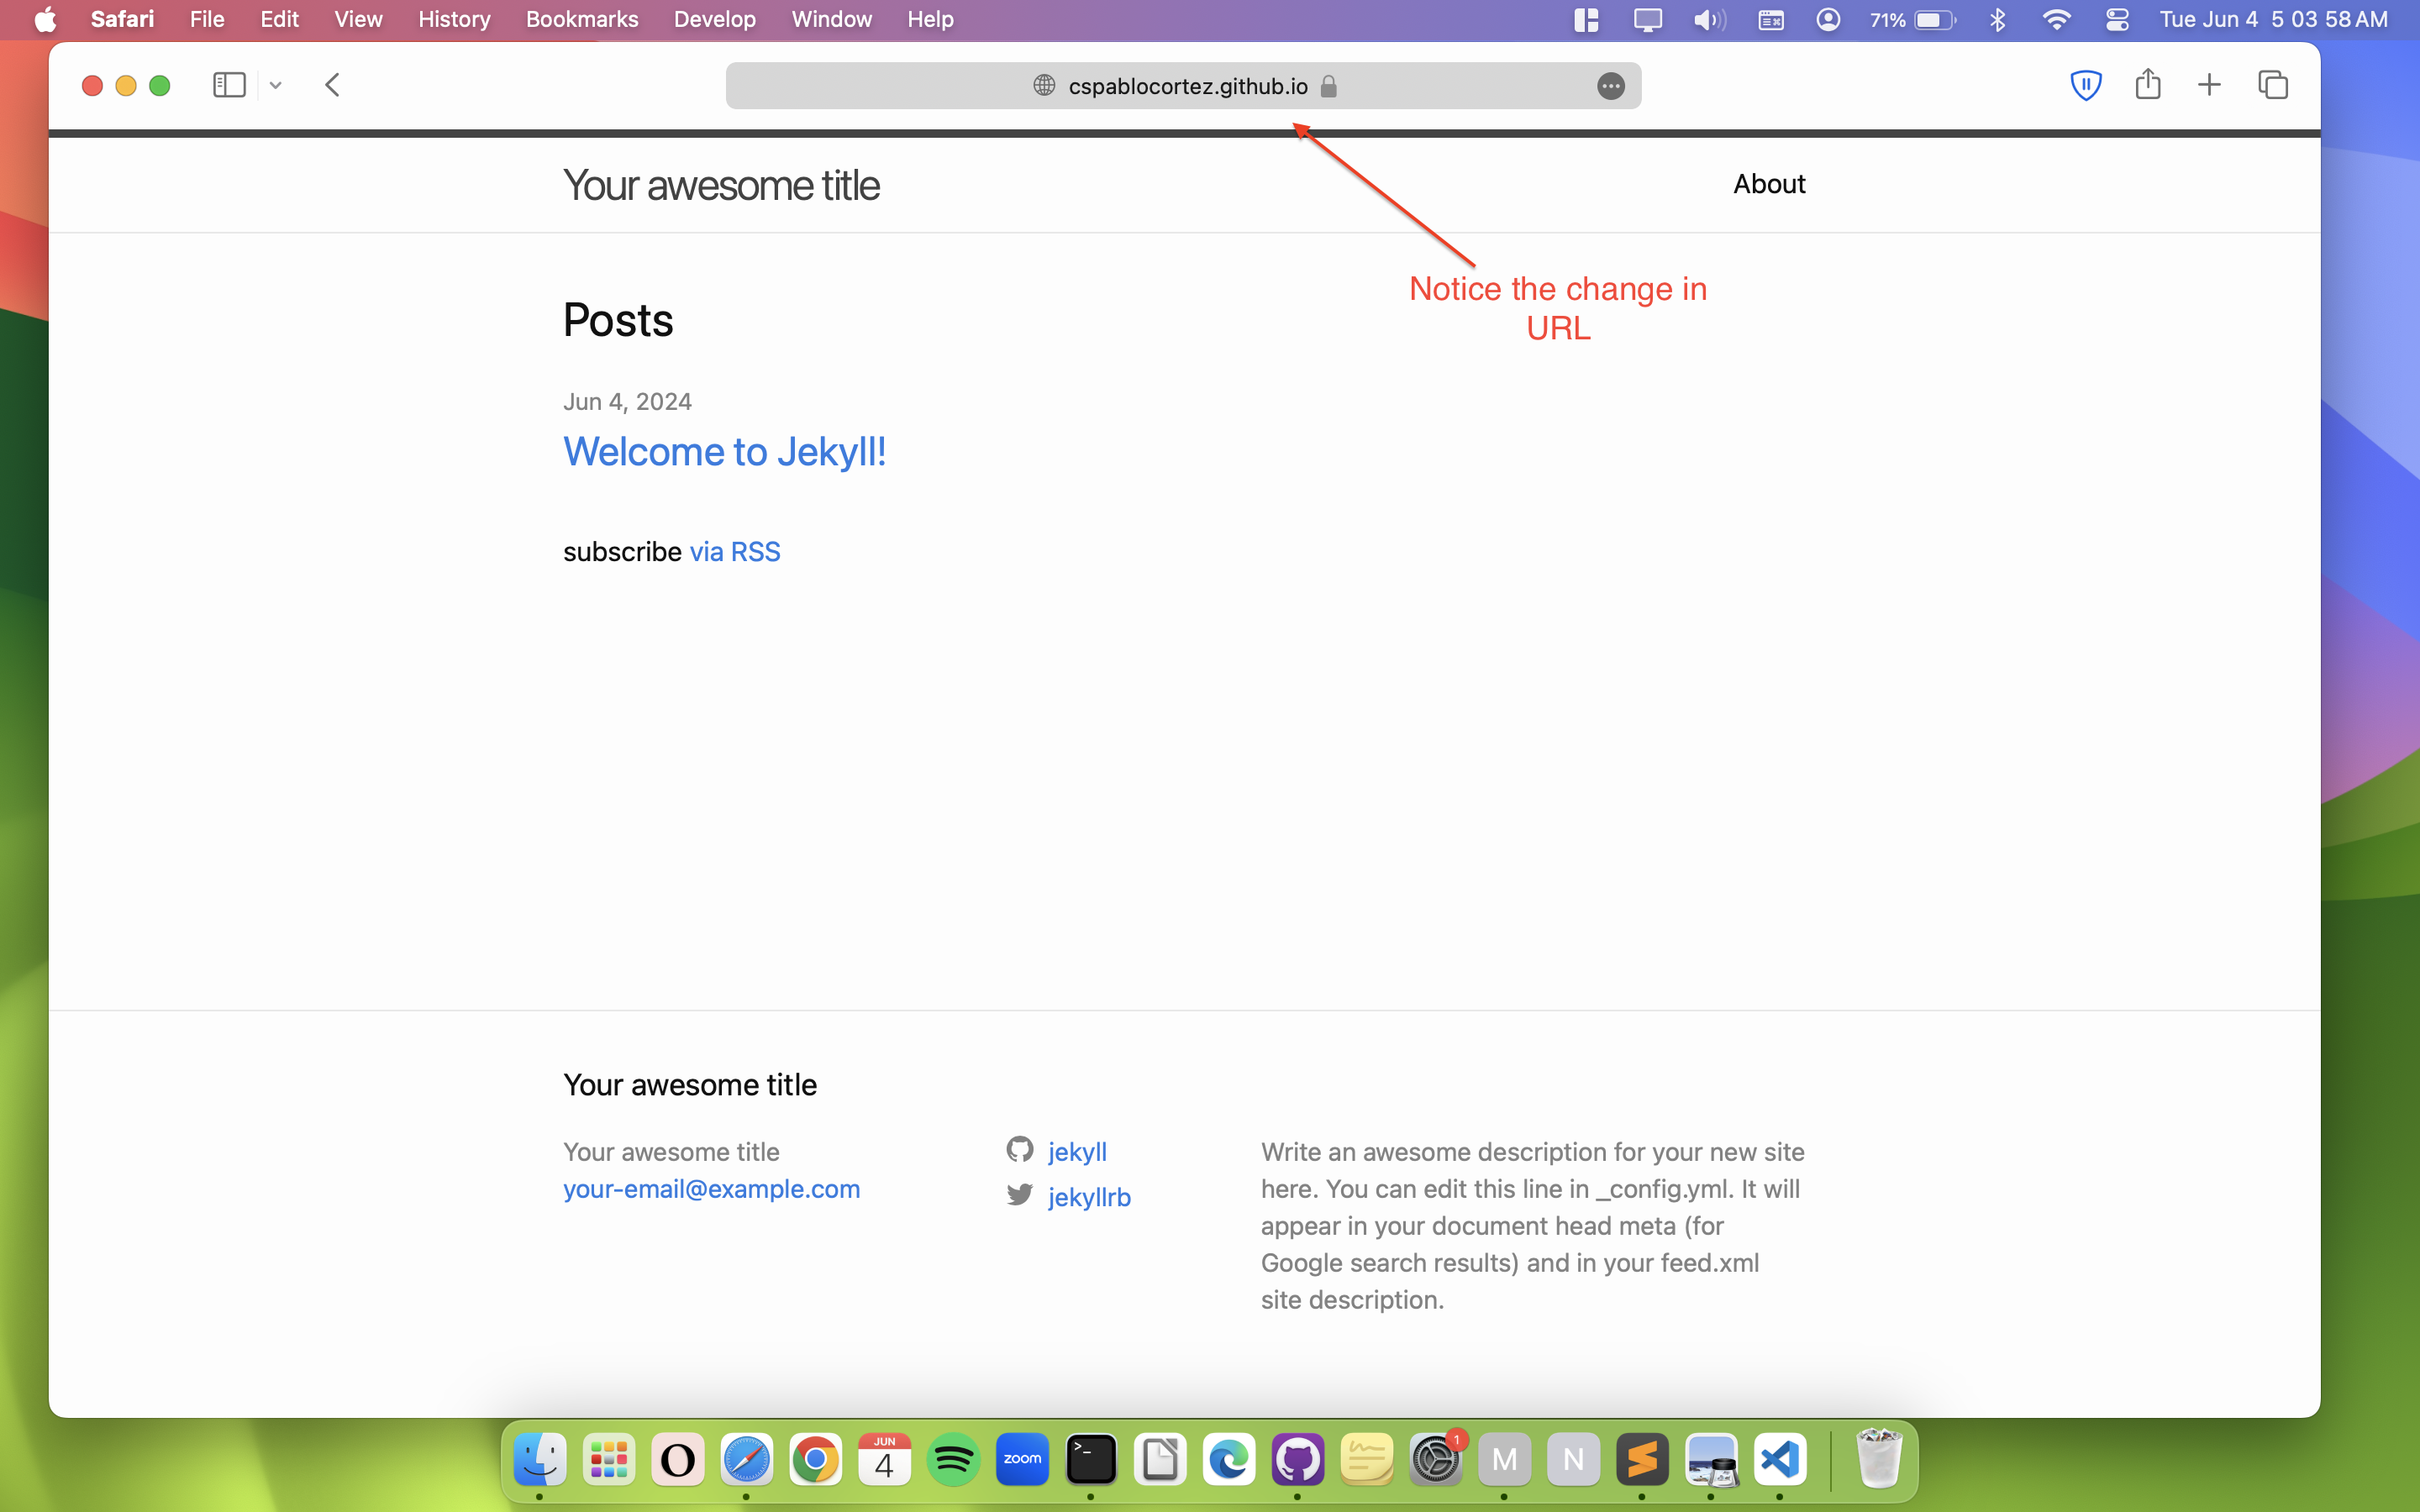
Visit your project repository on Github. You should see all you files uploaded, and at this point you may see an amber dot next to your commit message. This indicates that there is a Github Pages build in process. In other words, your site is being processed by Github and after it is done (usually takes anywhere from 60 to 180 seconds) you should see your website live at https://username.github.io:
Conclusion
If all went well, you now have a fully functioning website. In the next entry, we will be going through the files in our project to understand what each one is for, although our focus will mainly be on just one folder, _posts. Here, you will be creating Markdown files that Github Pages will automatically turn into HTML documents.
Next: Part 3 - Devlog Project Structure
Footnotes
-
In this article from 2008, you can read more about Tom’s motivation for creating Jekyll, which will help you understand its context, especially considering the existing static site generation tools of the time. ↩